Unlocking the Secrets of Picture Illumination Design
Unlocking the Secrets of Picture Illumination Design
Understanding Picture Illumination Design
In the realm of visual arts, the significance of picture illumination design cannot be overstated. Picture illumination design creates a captivating atmosphere that enhances the artistic expression and brings out the beauty of each image. This design practice is essential for artists, photographers, gallery owners, and anyone who wants to showcase images effectively. In this article, we will explore the various facets of picture illumination design, including techniques, tools, and best practices.
What is Picture Illumination Design?
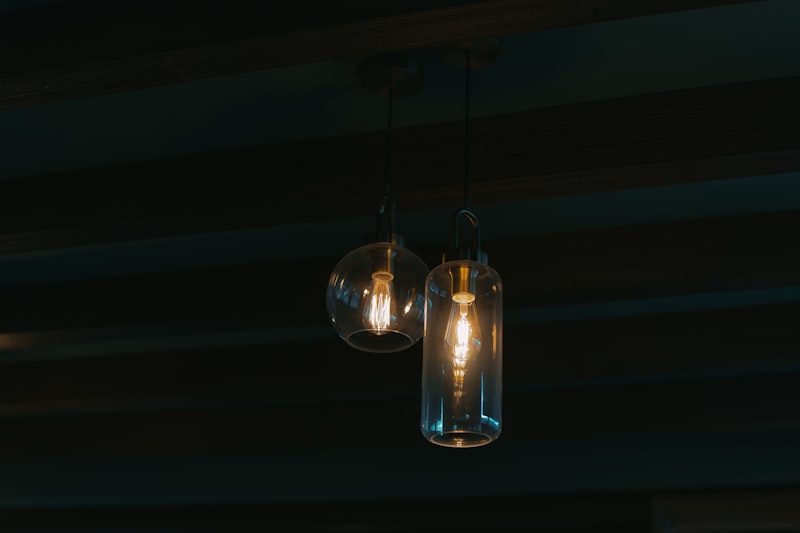
Picture illumination design refers to the strategic use of light and shadow to enhance the Aesthetics of an image. This form of design involves various factors, including the quality of light, the angle of illumination, and the color temperature, which all contribute to how a picture is perceived by its audience. Proper illumination not only highlights the picture's details but also sets the mood and atmosphere that can evoke emotions in viewers.
The Importance of Proper Illumination in Visual Art
When it comes to visual art, illumination plays a critical role. Here are some reasons why:
- Enhances Details: Proper lighting helps reveal intricate details in a picture that might otherwise go unnoticed.
- Sets the Mood: The type of illumination can greatly influence the emotional response of the audience.
- Shapes Visual Perception: Light can manipulate how colors and forms are perceived, making images appear more vibrant or subdued.
- Guides Focus: By strategically illuminating areas of a picture, the viewer's attention can be directed to specific elements.
Key Techniques in Picture Illumination Design
There are several techniques in picture illumination design that can be employed to achieve optimal results:
1. Natural Lighting
Utilizing natural light sources can give a picture an organic feel. Photographers often take advantage of the golden hour, which occurs shortly after sunrise or before sunset. This soft, warm light creates a beautiful ambiance and reduces harsh shadows.
2. Artificial Lighting
Artificial lighting can be adjusted for both intensity and direction. For instance:
| Type of Light Source | Description |
| LED Lights | Energy-efficient and versatile with various color temperatures. |
| Spotlights | Creates dramatic focus on specific areas of the artwork. |
| Backlighting | Illuminates an image from behind, adding depth and enhancing colors. |
3. Light Angle
The angle of the light source significantly impacts the visual texture of a picture. Side lighting can create shadows that enhance textures, while front lighting can flatten the appearance of depth. Experimenting with angles can lead to striking results.
4. Color Temperature
The warmth or coolness of the light can dramatically transform the mood of a picture. Warmer light tends to create a cozy feel, while cooler light might evoke a more sterile or formal atmosphere.
Tools for Picture Illumination Design
To achieve effective picture illumination, various tools and equipment can be employed. Here are some essential items:
- Light Meters: Essential for measuring the intensity of light in a scene, ensuring proper exposure.
- Diffusers: Used to soften harsh light and reduce shadows.
- Reflectors: Help bounce light onto an image, illuminating shadowed areas.
- Tripods: A steady support to avoid motion blur in low-light conditions.
Common Mistakes in Picture Illumination Design
When designing illumination for pictures, it is easy to make a few common mistakes that can diminish the quality of the final image:
- Overexposure: Excessive light can wash out details and colors.
- Underexposure: Insufficient lighting can lead to murky images, obscuring details.
- Flat Lighting: Failing to create depth through shadow can make images appear lifeless.
Case Studies: Famous Examples of Picture Illumination Design
Several artists and photographers have mastered the art of picture illumination design. Here are a few notable examples:
1. Ansel Adams
Famed for his stunning black-and-white landscape photography, Adams utilized the interplay of light and shadow to create dramatic effects in his images. His technique known as the "Zone System" allowed for meticulous exposure and development control, amplifying textural details.
2. Claude Monet
A pioneer in the Impressionist movement, Monet’s use of light in his paintings profoundly impacted how we view color dynamics. His focus on natural light and its changing qualities allows him to capture fleeting moments beautifully.
Best Practices for Picture Illumination Design
To create stunning, well-illuminated images, keep in mind the following best practices:
- Plan the Lighting: Before starting, map out your illumination strategy based on the desired mood and details to highlight.
- Experiment: Don’t be afraid to try different lighting setups, angles, and sources to find what works best for your picture.
- Review and Adjust: After capturing the initial image, review it and make any necessary adjustments to your lighting setup.
- Post-Processing: Use photo editing software to fine-tune brightness and contrast, enhancing the illumination effects even further.
Conclusion and Recommendations
In conclusion, picture illumination design is a crucial aspect of visual presentation that can dramatically influence how art and photography are perceived. By understanding the various techniques, tools, and common pitfalls, artists and photographers can enhance their work and create images that resonate with audiences. Remember to explore natural and artificial lighting, experiment with angles and color temperatures, and continuously refine your approach. Embrace the beautiful interplay of light and shadow, and allow your creativity to shine!